
The Western Blot.
You can hate it or love it but either way, you’re going to be doing it all day long.
I have a colleague who wouldn’t mind doing the technique alone for his entire internship. He would utilize the incubation time for other things- like applying for Ph.D. abroad.
I don’t have a liking for it but that is my own fault- I used to make an error each time I performed it. The first time, I broke the short plate, the second time, there was a massive air bubble in the center of the blot and a third time I put an unstained protein ladder after which it was a miracle that I could even identify the bands and cut the blot later.
Although I wouldn’t want to brag about it, because I’m superstitious enough to know better- the day you brag about your experimental skills, something will go wrong. I, sure as hell, don’t want a two-day procedure with expensive antibodies to go anything but perfect.
It’s interesting though, people in science shun superstitions and yet we seem to be aligning the stars for certain experiments.
What am I talking about?
The title of this blog doesn’t do justice to the magnificent, if not a bit cumbersome, technique. Essentially, I can break it down in four lines-
- Load an (equal) volume of proteins into “wells” in a gel.
- Proteins separate on the basis of their (molecular) weight.
- Proteins are “transferred” onto a “membrane.”
- Specific antibodies are used to identify desired protein(s).
Step 1: SDS-PAGE
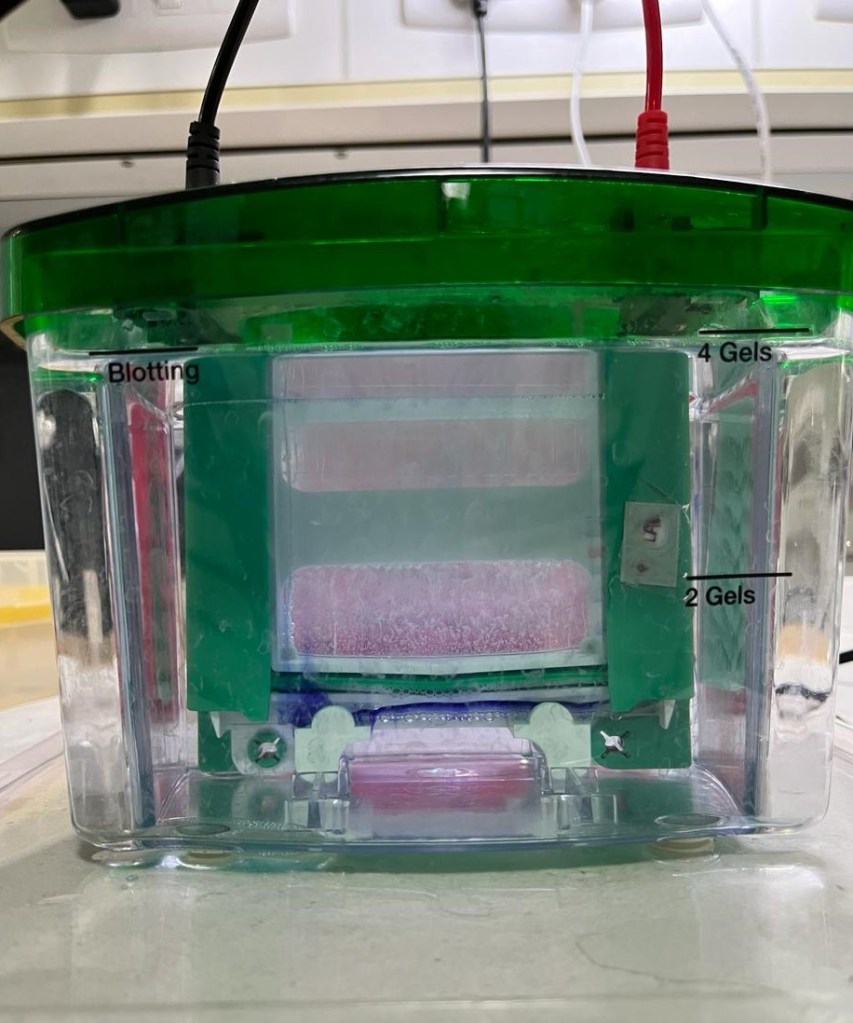
If you see a thin blue line at the end of my gel, that’s the dye that we use to see where we’re “loading” the proteins. Proteins are not visible because (a) they’re too small, nanoscopic and (b) they don’t have any color.
In this step, a sort-of cell lysate is loaded onto small wells at the top of the gel (if you refer to the picture). Cell lysate is when one disrupts the cells, in my case, by sonication or sound waves, such that all of the cell’s contents (here, proteins, but you can also find RNA, DNA and everything that makes up a cell) are readily available (in simple terms).
SDS is sodium dodecyl sulfate which breaks up the protein structure, such that instead of being big globular or fibrous particles they’re more like a thin chain of amino acids.
In this manner, when an electric current is applied, the proteins move down the gel based on their weight. The larger ones move slower.
Step 2: Transfer of proteins from gel onto a membrane
Gels are fragile and can shrink or get dehydrated if kept for long. In this manner, membranes made of nitrocellulose or polyvinylidene difluoride (PVDF) are easier to handle for further steps. Thus, again, under the influence of electric current, the “proteins” are transferred onto a membrane.
Step 3: Blocking
I almost forgot this step the last time I performed this technique. Ideally, we use antibodies to specifically identify our protein of interest. This is because antibodies are very specific. Its the same principle are how our body creates antibodies against foreign pathogens based on the specific proteins present on the pathogen (or bacteria or parasite).
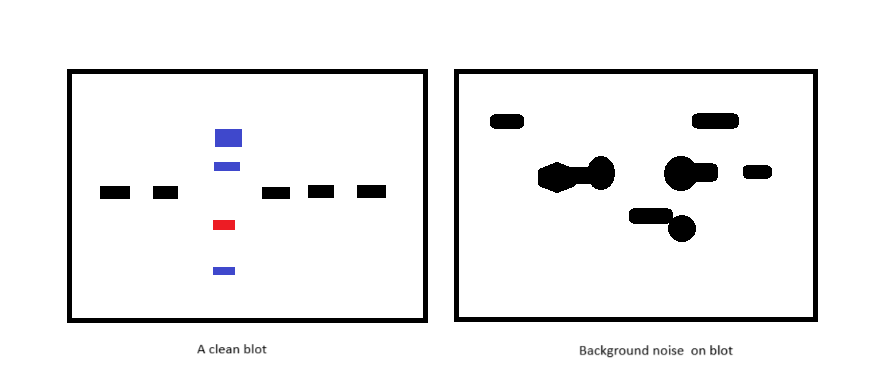
Blocking is an essential step as it prevents the precious (expensive) antibodies from binding to other random proteins because in some cases, some very very similar proteins appear as “background noise.”
Step 4: Using antibody probes
Finally, (primary) antibodies probe through our membrane to find the specific protein and bind to it. Later, a secondary antibody is used that binds to the previous one. The secondary antibody is used to identify the exact site since it is chemiluminescent (emits light due to a chemical reaction).
Antibodies are also protein molecules. They’re proteins that bind to other proteins. They are naturally produced in the body against anything foreign (not naturally a part of the body) and industrially produced in cells of different species.
For example, against a human protein that one is trying to identify, an antibody can be produced in mice. A secondary antibody, which is against the primary one, will then be “raised in” another species like goat or donkey.
A similar mechanism is also used in many ELISA testing kits (like the one used for HIV) or even rapid detection kits like those of dengue or hepatitis. In case of dengue or hepatitis, some diagnostic kits identify the protein (antigen) of dengue or hepatitis virus and some identify the individual’s antibodies that were produced against the virus.
Some interesting things that I learnt from this technique
- PVDF membrane must be wet with methanol, a process called “charging” the membrane.
Usually, the gel is run and transferred in a buffer. For running the gel, I use tris-glycine along with SDS while for transfer I use tris-glycine and methanol. Basically, these components allow the gel to do its thing- separate the proteins with good resolution. Methanol helps to remove the SDS from the protein, helping in transferring only the protein to the membrane.
In this case, methanol can actually dissolve nitrocellulose membranes but in case of PVDF, it activates it, thus they have a higher binding capacity and are best for low expressed proteins as compared to nitrocellulose which is great for small proteins.
Nitrocellulose has extremely small pores, 0.2 or 0.45µm in size, that are great to bind (bascially fix) really small proteins. You can imagine it in a way that small proteins sort-of get stuck in these pores.
Also, PVDF membrane has hydroxy(OH) groups that help in protein binding. Usually membrane-protein binding is by non-specific hydrophobic interactions. - A 5x loading dye is used to track the progress of running the gel.
Usually loading dyes are made of glycerol or xylene cyanol (appears greenish). Tracking dyes like bromophenol blue or orange G or xylene cyanyl FF help to visualize till where the gel has run.
After all, the gel is open on both ends. If kept for too long, all the proteins will run out of the gel and into the buffer. Thus, the need for tracking them. - Stained or unstained protein ladder.
A protein ladder essentially helps to identify the size of proteins. The ladder consists of bands with known sizes and referring to it, one can identify the size of the protein of interest.
I use stained ladders because it helps to be able to visually see a ladder when locating my protein. One can claim that an unstained one is more accurate since stained ones have dyes that can affect the “weight” or size (like, increase the weight leading to it being less accurate than it appears).
In my personal opinion, unless you have two proteins to identify which have extremely similar sizes, you don’t really need to use an unstained ladder. Using a stained protein ladder is more convenient. - Presence of saccharide (sugar) or phosphorus or “ubiquitin” groups on the proteins affect their movement since they change the “weight.” In some cases, proteins can get degraded or be on the receiving end of proteases or protein-degrading enzymes. Most labs use a protease- inhibitor to prevent this before beginning western blotting, as in when we’re making a cell lysate, after sonication.
- Blotto or BSA.
Blotto or milk casein (non-fat milk) or bovine serum albumin (BSA). That is the real question.
The extra or free hydroxy groups on the membrane are bound to these “blocking” agents, preventing antibodies from binding randomly on the membrane and creating “noise.”
Blotto is easily available and less expensive which makes it an easier choice. Usually, 5% Blotto is good for antibodies that bind too intensely and for target proteins that have a good (high) expression. In case of low expressed proteins (proteins in low quantity) in the cells or phosphor-specific antibodies, 5% BSA is used.
Milk proteins contain, as the name suggests, mixed proteins which can hinder binding in case of proteins expressed in a low quantity and casein which can hinder the specificity of the phosphor-specific antibodies.
Thus, the choice depends on the primary antibody and the target protein of your choice.

6. TBS-T washes.
Tris-buffered saline, which maintains a pH of 7.4 (similar to the human blood) is used to “wash off” excess antibodies or those which do not bind to any protein. That’s due to the presence of something called polysorbate 20 or its commercial and more well known name, Tween-20. Its essentially a detergent and a common buffer component which helps remove any background noise. In some cases, it also “blocks” or prevents the non-specific binding of antibodies.
7. Chemiluminescence to detect the protein-antibody complex.
Secondary antibody contains a protein called “horseradish peroxidase” or HRP. In the presence of peroxide buffer, HRP oxidizes “luminol”, which is an organic molecule that produces light when oxidized. 3-aminophthalate is produced which is an excited state molecule and emits light at a wavelength 425nm (dark blue or indigo color). This molecule emits light and decays back to a ground state quite fast. The light is a signal detected by a software.
That was my take on the western blot technique. Hope you found something interesting or new in this blog. My goal is to make science understandable and readily available to everyone and prevent any bias against the scientific process.
I hope we all can appreciate facts and not simplified phrases like ”scientists have said” or “scientists found” because science is a dynamic field and changes quite often. In this case, when “scientists find new proteins or find new functions of proteins or enzymes,” one of the key methods to detect those proteins is the western blot.
For more information do visit these websites-
- Mahmood, T., & Yang, P. C. (2012). Western blot: technique, theory, and trouble shooting. North American journal of medical sciences, 4(9), 429. doi: 10.4103/1947-2714.100998 PMID: 23050259
- Thermo Fisher Scientific. Western Blotting. Website. (Accessed on February 1, 2024)
- Abcam Limited. Prestained protein ladders and unstained protein ladders. Website. (Accessed on February 1, 2024)
- Bioss Antibodies. (2022) Which is better, BSA vs. Non-Fat Milk, in Western Blot? Bioss USA. Website. (Accessed on February 1, 2024)
- Sino Biological. Chemiluminescent Western Blotting Detection. Website. (Accessed on February 1, 2024)


Leave a reply to Immuno-fluorescence – Groundbreaking Grewall Cancel reply